There is lots to report on, so let's get right to it.
To act as Project Lead, we brought in expert help. Meet Christian Pack. He was the guide and mentor during this stage of the Project.
 |
| Christian with his "I'm All Thumbs" pose |
Day 3: The Rebirth
To start, the laminate being laid down is thicker then the old stuff. So we needed to reduce the height of the baseboard (that we were leaving attached to the wall).
With a Jamb saw the baseboard was cut so the laminate could easily slip underneath it. This was done everywhere but the Family Room (as there is no existing baseboard in the there).

We decided to start in the kitchen.
The dishwasher needed to be removed as there was still baseboard underneath it that needed to be excavated to expose the sub floor. Pretty easy. However, it was later determined that the dishwasher shutoff valve was not working correctly, and caused water to leak, which, of course ended up soaking the sub floor. (why would anything as simple as a shutoff valve work properly?)
Later that night I went got a proper valve and installed it. But here is a shot of our temp fix.

In the meantime, as we waited for the floor to dry there was plenty of other work to do.
The sub floor in the Kitchen was not level. So placing laminate on it would be a teeter-tottering good time. The floor needed to be plained down flat (difficult when there are nails in the floor).
 |
| Just a plain floor, right? |
Once the floor was ready we could start laying down the underpad (on the non-wet areas). With the underpad down, we could sync up the floor to the living/dining room and creating the "line" from which the Kitchen, Hallway & Fam Room would be run.


Meanwhile the Fam Room floor needed to be eradicated of all staples much like the Kitchen floor. So while Christian started getting the floor going...once again I was relegated to staple removal. I swear that if I see one more staple in the next little while, I am going to lose my mind!
Then underpad was laid down in Fam Room.
So by the end of Day 3 things looked like this:


Day 4: Keep Truckin'
As we continued the progress in the Kitchen and the Fam room there was ample supervision.
 |
| "Watching my man do physical work, fills me with triumph" |

 |
Here is the finished floors (the lighting in each room makes the floor look sightly different, but it is all the same):


Day 5: Perimeter Duty
This is the final day, and Kel is on vacation in Washington, so from this point forward, you will most likely being seeing this before she is. (note: she also took the camera, so the following pics were taken either with the phone or tablet, so excuse the quality please)
Anyway...this is where it gets interesting
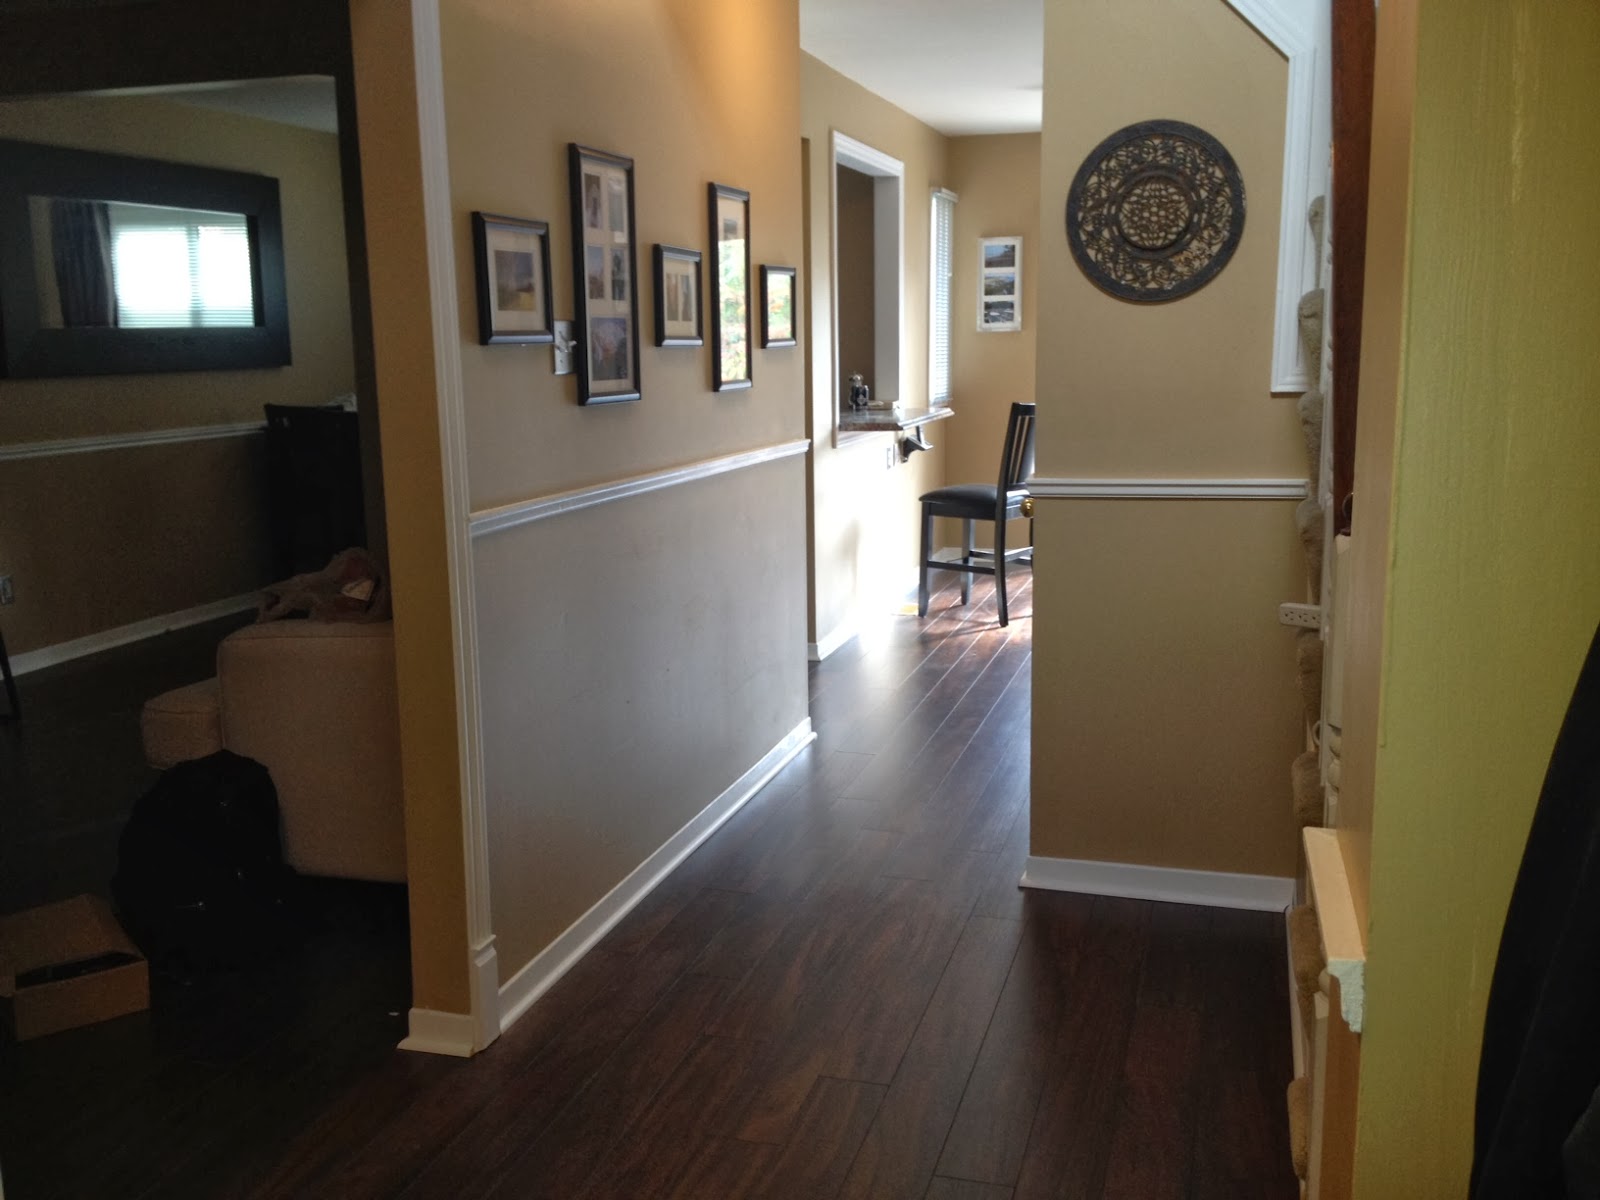
The first part was laying new quarter-round in the Hallway and Kitchen. The old stuff was just too beat up to lay back down and looked horrible against the new floor. So that was my job.

I delegated and gave Christian the more skills-oriented work.
In the Fam room, there was an added challenge of figuring out how to run the speaker cable to the surround sound speakers. It used to run under the carpet, but now with flooring, that is not an option.
The resolution we came up with was to put a base board molding in the Fam Room (where previously there was none), and build a cable channel into it where the cable would run and be hidden.
The base molding would be a square design to compliment the style of wainscoting that runs around the middle of the room.
Here is some pictures of the baseboard design:
.JPG)


Once installed you can see how the cables came in and out of the molding.


Next it was time to paint the molding too match the wall color. But somehow the info on what that color is, had disappeared. The wall is a type of real-wood panelling that continuously splintered when i tried to chisel a chunk out of it and couldn't get a big enough piece for them to computer scan a color match. So I needed to drill a new large hole in the wall (where furniture would cover it) and get a large sample. However, in drilling the hole, when I went to pull the drill back out, the chunk fell down into the wall. To make a 45 min ordeal short, a coat hanger and some gum helped to retrieve the piece. And luckily they were able to color match it.


After painting the walls looked like this:


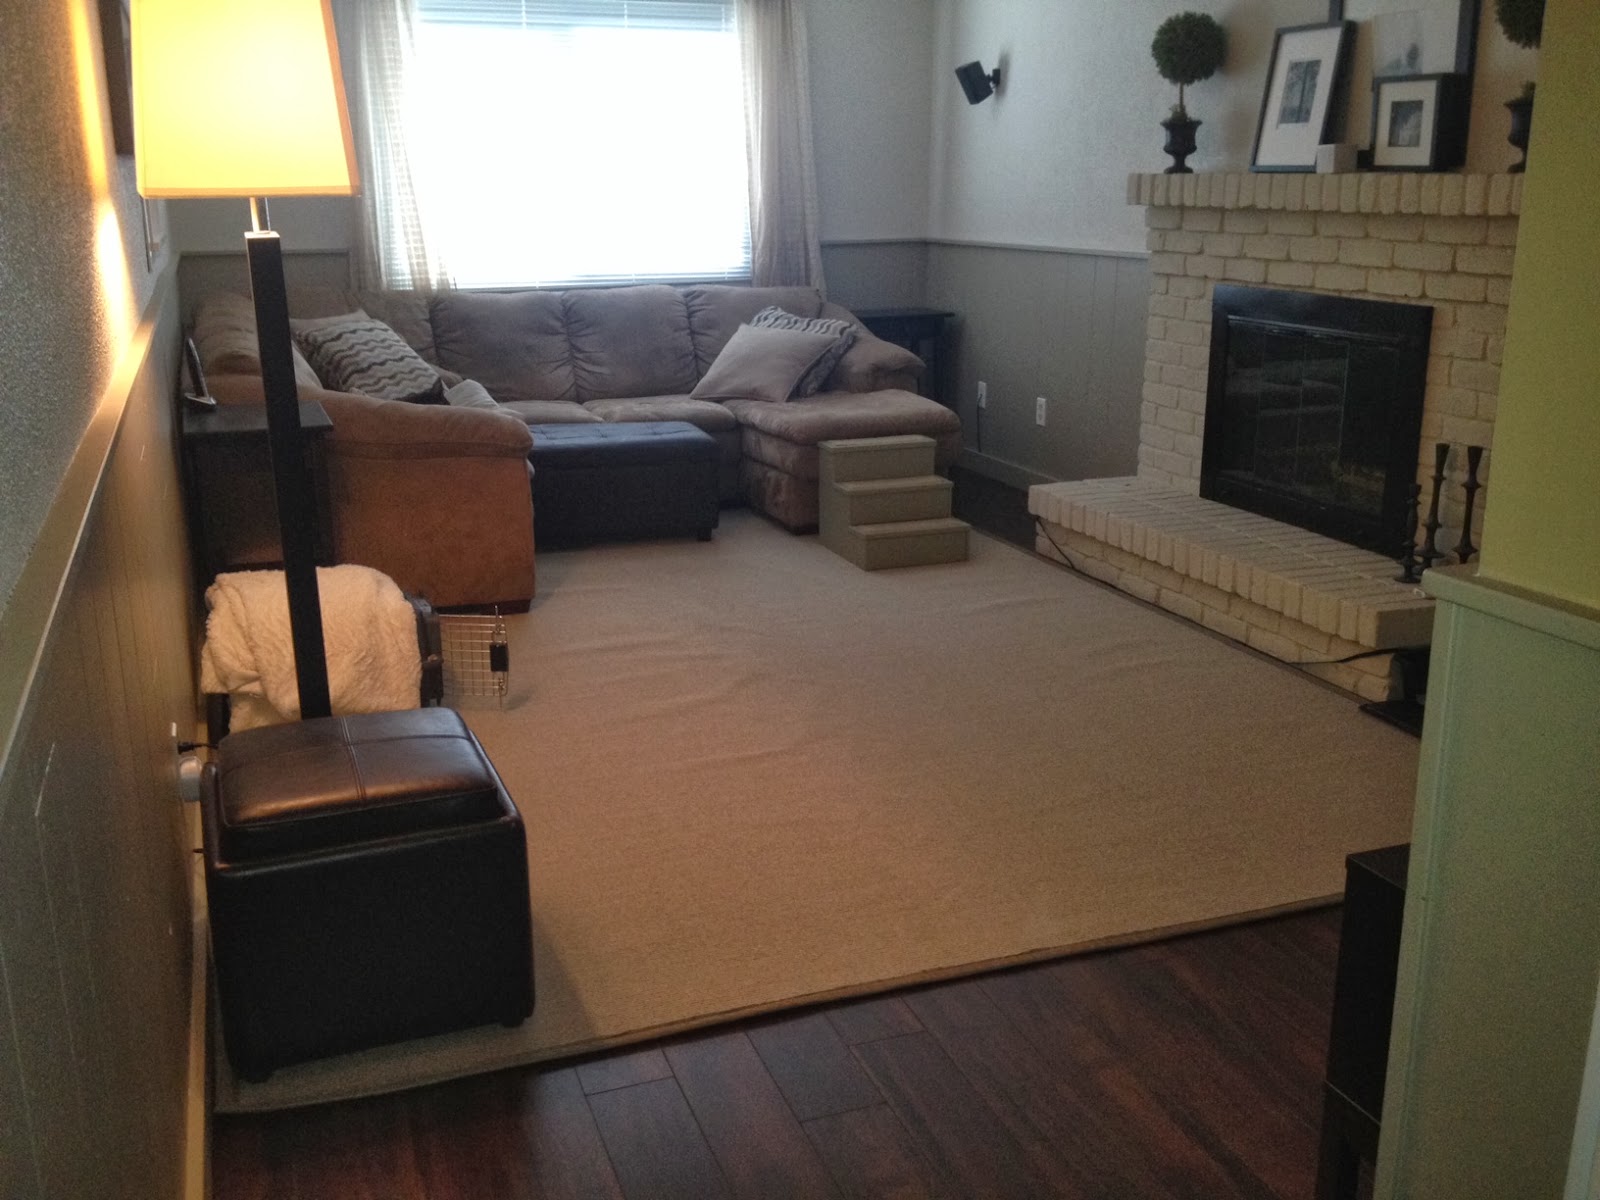
Next it was time to go and pick up the Family Room's new rug. Which is a pain in the but to install by yourself (its new so a bit wrinkly)
Here are pics of the finished Fam room.

Shots of Kitchen and Hallway


Any way, I think that it is it for the blog.
But the work is not 100% done.
- I still have to get new hallway closet doors as I had to remove them completely (hopefully in my shots you can't see it as it is an eyesore). The previous owner bought doors the wrong size and "jimmy-rigged" them into place with bits and pieces of materials. I refuse to put up crappy doors after spending so much time making the place look half decent.
- I still have to caulk the quarter round, fill in nail holes, and paint holes white.
- fix the power in the closet...that's right I said power in the closet (I didn't talk about this in the blog...but if you see me and want a good Home Reno story, ask my about the Hallway closet security system and power outlet...its unbelievable).
- In the family room, I need to run the speaker cable under the brick hearth where it won't be seen, and on the sides paint it the same color as the fireplace to disguise it.
- New furniture for Fam room will be coming soon, so there's that too.
As always, thanks for checking this out and letting us share this experience with you.
K&K


